Using a flash (Flash photography)
When using a flash unit designed for use with the camera, you can choose from various shooting modes to meet your needs.
Flash units designed for use with the camera
Choose a flash unit to suit your needs, taking into consideration such factors as the output required and whether the unit supports macro photography. Flash units designed to communicate with the camera support a variety of flash modes, including TTL auto and super FP. Flash units can be mounted on the camera hot shoe or connected using a cable (available separately) and flash bracket. The camera also supports the following wireless flash control systems:
Radio-Controlled Flash Photography: CMD, ACMD, RCV, and X-RCV Modes
The camera controls one or more remote flash units by means of radio signals. The range of locations in which flash units can be placed increases. Flash units can control other compatible units or be fitted with radio commander/receivers to allow the use of units that do not otherwise support radio flash control.
Wireless Remote-Control Flash Photography: RC Mode
The camera controls one or more remote flash units by means of optical signals. The flash mode can be selected using camera controls (“Wireless Remote Flash Control (A RC Mode)”).
Features Available with Compatible Flash Units
| Flash unit | Flash control mode | GN (Guide Number, ISO 100) | Supported wireless systems |
|---|---|---|---|
| FL-700WR | TTL-AUTO, MANUAL, FP TTL AUTO, FP MANUAL, MULTI, RC, SL MANUAL | GN 42 (75/150 mm 1) GN 21 (12/24 mm 1) |
CMD, ACMD, RCV, X-RCV, RC |
| FL-900R | TTL-AUTO, AUTO, MANUAL, FP TTL AUTO, FP MANUAL, MULTI, RC, SL AUTO, SL MANUAL | GN 58 (100/200 mm 1) GN 27 (12/24 mm 1) |
RC |
| STF-8 | TTL-AUTO, MANUAL, RC 2 | GN8.5 | RC 2 |
| FL-LM3 | Varies with camera settings. | GN 9.1 (12/24 mm 1) | RC 2 |
Maximum lens focal length at which the unit can provide flash coverage (figures following slashes are 35 mm format equivalent focal lengths).
Functions as commander (transmitter) only.
Attaching Compatible Flash Units
The methods used to attach and operate external flash units vary with the unit. See the documentation provided with the unit for details. The instructions here apply to the FL-LM3.
- Confirm that both the camera and flash unit are off. Attaching or removing a flash unit while either the camera or flash unit is on could damage the equipment.
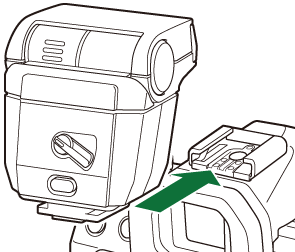
Remove the hot shoe cover and attach the flash.
- Slide the flash in until the foot clicks into place at the back of the shoe.
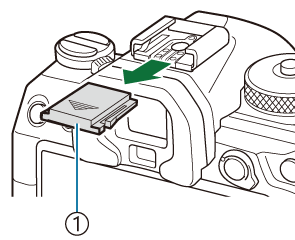
- Hot shoe cover
Position the flash head for bounce-flash photography or direct lighting.
- The flash head can be rotated up and left or right.
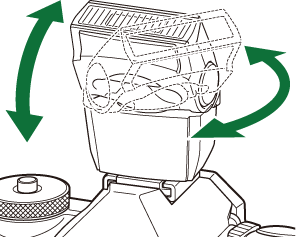
- Note that flash output may be insufficient for correct exposure when bounce flash lighting is used.
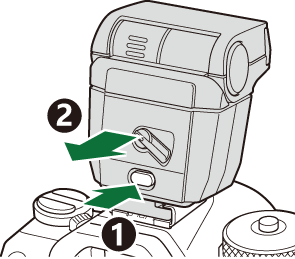
Rotate the flash ON/OFF lever to the ON position.
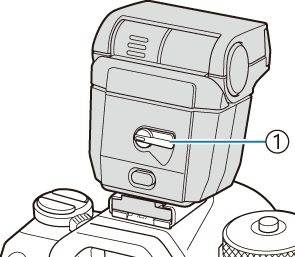
- ON/OFF lever
- Rotate the lever to the OFF position when the flash is not in use.
Removing Flash Units
Keeping the UNLOCK button pressed, slide the flash unit from the hot shoe.