About This Manual
How to find what you want to know
You can use the following methods to find what you want to know in this manual.
| Search method | Where to look |
|---|---|
| Search based on what you want to do | g “Table of Contents” |
| Search based on names of buttons and parts of the camera | g “Names of parts” |
| Search based on menus and terms displayed on the monitor | g “Default Settings” |
How to read this manual
Supported shooting modes for each function
In this manual, the shooting modes in which each shooting function can be used are listed at the top of the function description. Black indicates supported shooting modes, while gray indicates unsupported shooting modes.
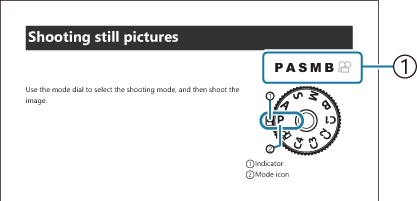
- Supported shooting modes
Configuring functions
In this manual, the configuration method for each function is described at the beginning of the function description. For details, refer to “How to operate the menus” and “How to change the shooting settings”.
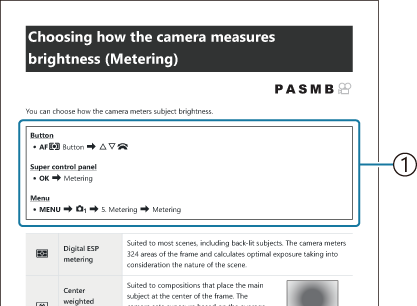
- Method
Symbols in this manual
The symbols below are used throughout this manual.
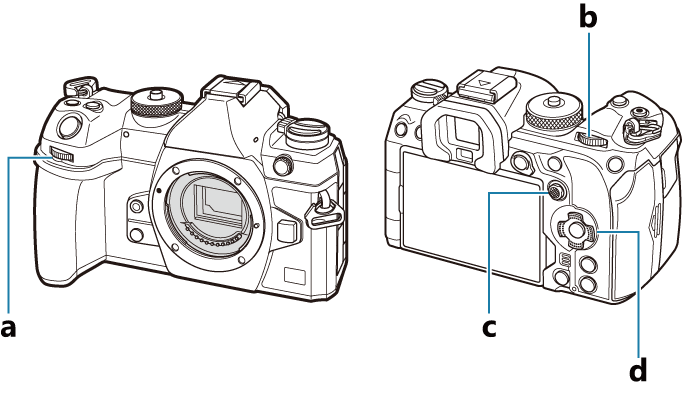
| FGHI | Indicates an operation performed by pressing the buttons (respectively the up, down, left, and right arrow buttons) on the arrow pad (d). |
|---|---|
| l | Indicates an operation performed using the front dial (a). |
| i | Indicates an operation performed using the rear dial (b). |
| T | Indicates an operation performed by placing your finger lightly on the multi selector (c) and tilting it in the desired direction. |
| U | Indicates an operation performed by pressing the center of the multi selector (c) like a button. |
| C | Cautions and limitations. |
| B | Tips and other helpful information for using the camera. |
| g | References to other pages in this manual. |
Screen illustrations in this manual
The camera monitor displays the super control panel (“The Super Control and LV Super Control Panels”) by default. The screen illustrations in this manual, however, show the live view display.
To learn how to display the shooting display on the monitor, refer to “Switching between displays”.