Shooting automatically with a fixed interval (Interval Shooting)
You can set the camera to shoot automatically with a set time lapse. The shot frames can also be recorded as a single movie.
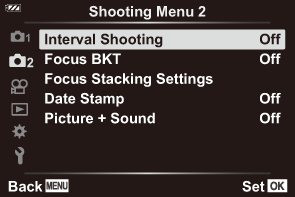
Highlight [Interval Shooting] in 7 Shooting Menu 2 and press the OK button.
- Highlight [On] and press I.
Adjust the following settings and press the OK button.
Number of Frames Choose the number of frames shot.
[2]–[299] (frames)
Start Waiting Time Choose how long the camera waits before starting interval-timer photography and taking the first shot.
[00:00:00]–[24:00:00]
Interval Length Choose how long the camera waits between shots once shooting has begun.
[00:00:01]–[24:00:00]
Interval Mode Choose whether the camera prioritizes taking photographs at the selected interval or taking the selected number of photographs.
[Time Priority]/[Frames Priority]
- If [Time Priority] is selected, the previous exposure may not end before the next is due to begin. The final number of photographs may be less than that chosen for [Number of Frames] if, for example, [Interval Length] is very short or shooting for each interval takes a long time to complete.
Exposure Smoothing Adjust exposure to average out differences between shots. This smooths exposure changes during the time-lapse movie.
[Off]/[On]
Time Lapse Movie Choose whether to record a time-lapse movie.
[Off]: The camera saves the individual shots but does not use them to create a time-lapse movie.
[On]: The camera records the individual shots and also uses them to create a time-lapse movie.
Movie Settings Choose the frame size ([Movie Resolution]) and frame rate ([Frame Rate]) for movies created using [Time Lapse Movie].
The options available for [Movie Resolution] are:
[4K], [FullHD], [HD]
The options available for [Frame Rate] are:
[30fps], [15fps], [10fps], [5fps]
- The actual [Start Waiting Time], [Interval Length] and [Estimated Start Time] may differ from the selected value depending on shooting settings. The values listed are for use as guidelines only.
Press the OK button repeatedly to return to 7 Shooting Menu 2.
- Press the MENU button to exit the menus.
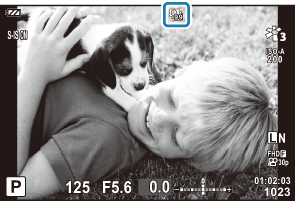
A t icon will appear in the shooting display (the icon shows the selected number of shots).
Release the shutter.
- The specified number of frames will be shot automatically.
Time lapse shooting will be canceled if any of the following occurs:
- The mode dial, MENU button, or q button are operated; or a USB cable is connected
- Turning the camera off ends interval-timer photography.
- The [Image Review] option in the e Setup Menu functions with a display time of 0.5 seconds.
- If the time until shooting or the shooting interval is 1 minute 31 seconds or longer, the monitor will go dark and the camera will enter sleep mode if no operations are performed for 1 minute. The display will turn on automatically 10 seconds before shooting for the next interval begins. It can also be reactivated by pressing the ON/OFF button at any time.
- No time lapse movie will be created if any frame is not recorded correctly.
- If there is insufficient space on the card, the time lapse movie will not be recorded.
- If there is not enough charge left on the battery, the shooting may end partway through. Use fully charged batteries, or use the USB-AC adapter to shoot for longer periods of time. If you are using the USB-AC adapter, insert the battery in the camera and select [Charge] in the dialog displayed after the USB cable is connected. Once the monitor has turned off, you can press the ON/OFF button to turn the monitor on again and continue to take pictures while charging is in progress.
- Time-lapse movies created at a size of [4K] may not display on some computer systems. More information is available on our website.