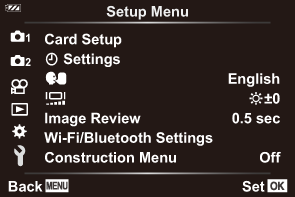
The Setup Menu
Adjust basic camera settings. Examples include language selection and monitor brightness. The setup menu also contains options used during the initial setup process.

| Option | Description |
|---|---|
| Card Setup | You can format the card or delete all images (“Formatting the card (Card Setup)”, “Deleting all images (Card Setup)”). |
| m Settings (Date/time setting) | Set the date and time (“Initial Setup”). |
| W (Changing the display language) | Choose a language for camera menus and guides displayed when configuring functions (“Selecting a language”). |
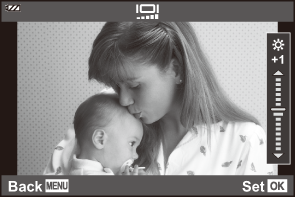
| b (Monitor brightness adjustment) | You can adjust the brightness of the monitor. Highlight an option using the FG buttons.
|
| Image Review | Choose whether pictures are automatically displayed after shooting. You can also configure how long the pictures are displayed. This is useful for a brief check of the picture you have taken. You can shoot the next shot by pressing the shutter button halfway even while the captured image is displayed on the monitor. [0.3sec] – [20sec]: Sets the length of time (seconds) to display the captured image on the monitor. [Off]: The captured image is not displayed on the monitor. [Auto q]: Displays the captured image, and then switches to playback mode. This is useful for erasing a picture after checking it. |
| Wi-Fi/Bluetooth Settings | Adjust settings for connection to Wi-Fi/Bluetooth®-compatible smartphones and optional remote controls using the camera’s wireless function (“Resetting wireless LAN/Bluetooth® settings”, “Disabling the Camera’s Wireless Functions“). |
| Construction Menu | Use and configure settings related to shooting construction photos (“Displaying the Construction Menu”). |

