
Charging the battery
- The battery will not be fully charged at the time of purchase. Charge the battery before use.
- When charging, be sure to insert the battery before connecting the USB cable.
The camera can be charged using the following methods.
- Using the USB-AC adapter F-5AC (sold separately) (“Charging the battery using an optional USB-AC adapter (F-5AC)”)
- Using a commercially available USB device (“Charging the battery using a USB device”)
- Using a charger sold separately (BCS-7) (“Using the charger (BCS-7)”)
Charging the battery using an optional USB-AC adapter (F-5AC)
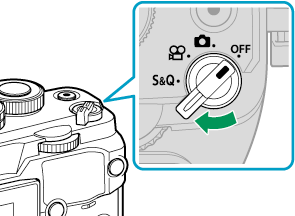
Confirm that the power lever is in the OFF position.
Connect the USB cable, USB-AC adapter, and AC outlet.
- Refrain from using any cable other than the USB cable (CB-USB11), which is sold separately.
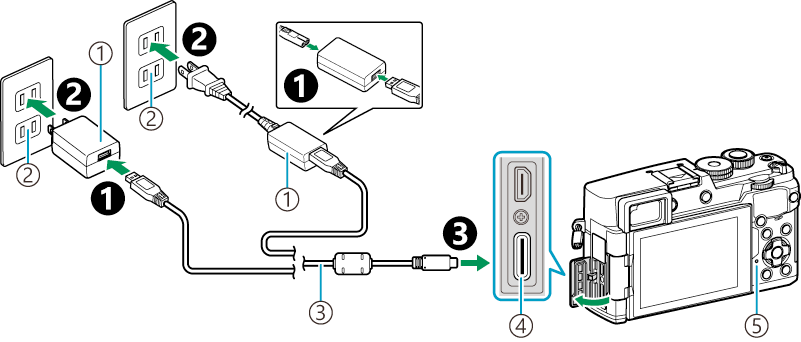
- USB-AC adapter F-5AC (sold separately)
- AC outlet
- USB cable CB-USB11 (sold separately)
- USB connector
- Battery charge lamp
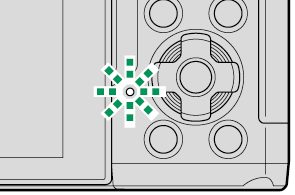
- The battery charge lamp lights during charging. Charging with the camera turned off takes about 3 hours. The lamp goes out as the batteries reach full charge. Remove the USB cable from the camera.
Charging the battery using a USB device
The battery inserted in the camera will charge when the camera is connected via a USB cable to a commercially available USB device.
Confirm that the power lever is in the OFF position.
Connect the camera to the USB device using a USB cable.
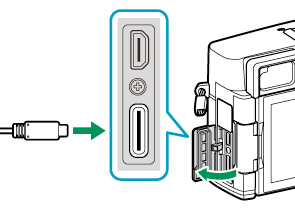
- The battery charge lamp lights during charging. Charging times vary with the output of the USB device. The lamp goes out as the batteries reach full charge.
- The supply of power ends when the battery is charged. Disconnect and reconnect the USB cable to resume charging.
- The camera can be powered using mobile batteries or similar devices connected via USB. For details, see “Powering the Camera via USB (Power Supply)”.
Precautions for charging
- If a charging error occurs, the battery charge lamp will blink. Disconnect and reconnect the USB cable.
If the battery charge lamp does not light when a USB-AC adapter or a commercially available USB device is connected to the camera, charging has not started. Charging may start when you perform the following steps.
- Remove the battery from the camera
- Disconnect the USB cable from the camera, if a USB-AC adapter or commercially available USB device is connected
- Confirm that the power lever is in the OFF position
- Leave the battery out of the camera for a while, then insert it into the camera again
- Connect the USB-AC adapter or commercially available USB device
- Be sure to unplug the USB-AC adapter for cleaning. Leaving the USB-AC adapter plugged in during cleaning could result in injury or electric shock.
- Charging may not start depending on the ambient temperature. If this happens, the battery charge lamp will blink.
- Charging stops when the battery temperature is too high. It will resume after the battery temperature falls.
- For safety reasons, charging may take longer, or the battery may not reach full charge, when the battery is charged in a high-temperature environment.
Using the charger (BCS-7)
Charge the battery.
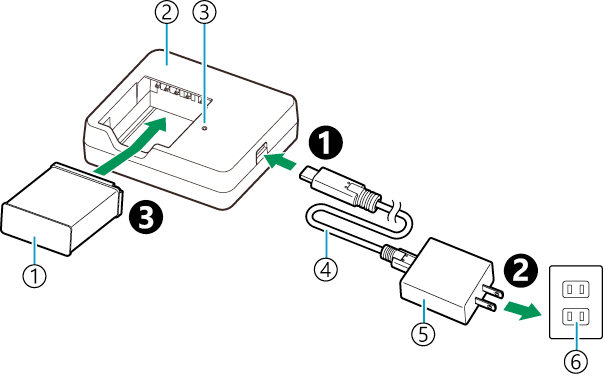
- Lithium ion battery (BLS-7)
- Lithium-ion charger
- Charging indicators
- USB cable (CB-USB13: sold separately)
- USB-AC adapter (F-7AC: sold separately)
- AC wall outlet
- When using the F-7AC, the charging time is approximately 1 hour 30 minutes. The charging time varies depending on the connected USB device.
See the table below for status of the charging indicators and battery charge.
Charging indicator Battery charge Lights orange Charging in progress Off Charging complete Blinks orange Charging error - See the documentation provided with the BCS-7 for details.